
Homemade Bagels
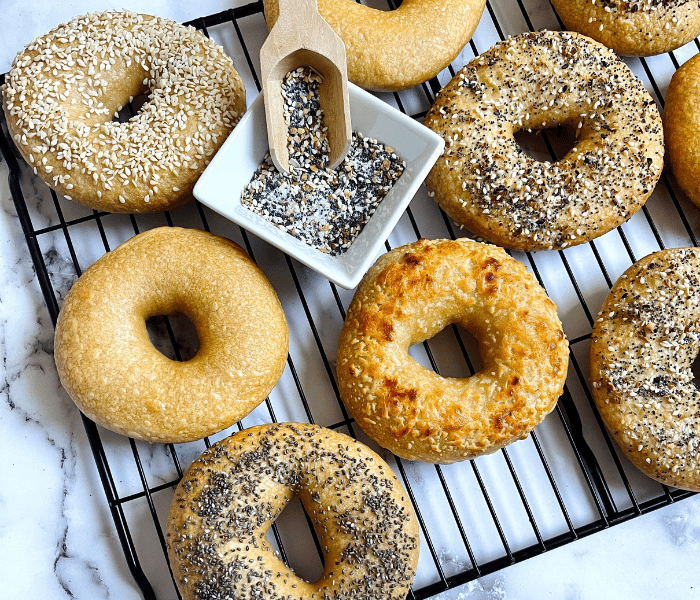
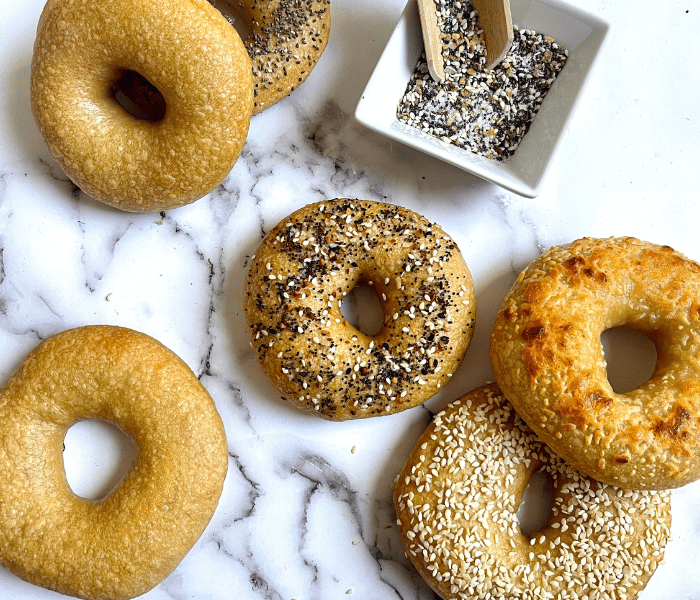
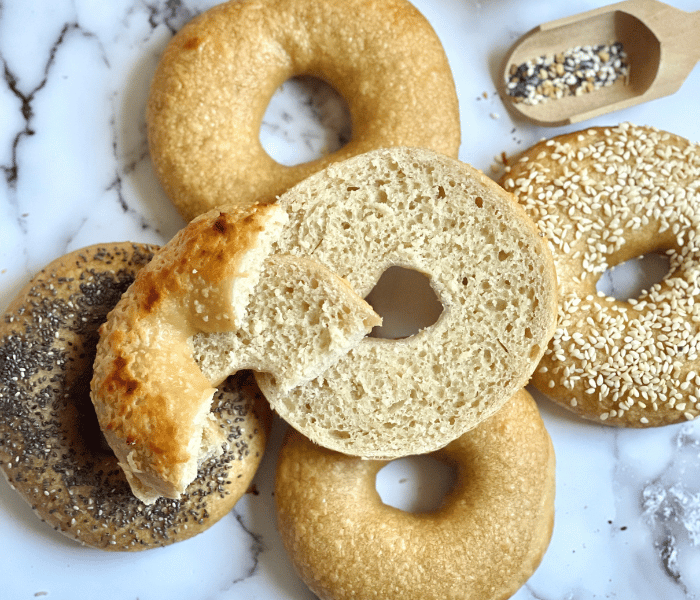
This is an easy and simple recipe for Homemade Bagels. Crisp on the outside, soft and chewy on the inside. Top it with a variety of seasonings, add some cream cheese, and you have got yourself a perfect breakfast on the go, or add an egg & meat for a complete meal.
I have been thinking of making Homemade Bagels for years!
But I never really needed to because whenever I craved one, I could stop by my favorite Bagel store down the road from where I lived.
But we moved this summer, and I have been missing the great selection of incredible Bagels from that lovely place!
So, I have been baking like a maniac to create a recipe that comes close to my true bagel hero! And I am so happy that, after lots of tweaking, I finally figured out the correct ratio to make these Homemade Bagels taste the way I like them – and you, hopefully, too!

[Disclosure: This page contains affiliate links. If you take action (i.e., make a purchase) after clicking on one of the links, I’ll earn some tea money, which I promise to drink while creating new content for you 🥰. You do not pay a higher price!]

Crucial Ingredients:
Bread flour:
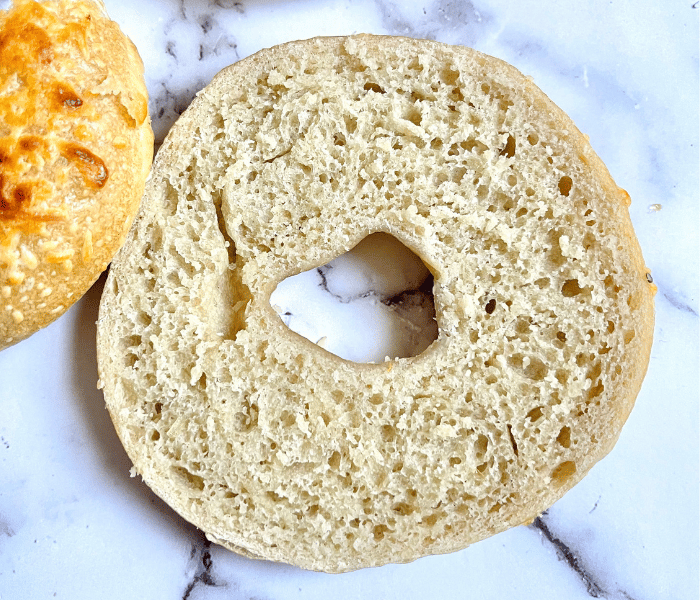
I have tried to make bagels with all-purpose flour to see the difference. And I highly recommend using bread flour for these bagels; it will make a huge difference in taste and texture.
Bread flour has a higher gluten percentage than all-purpose flour. Your bagel dough will be pulled, stretched, and boiled – it needs lots of gluten for elasticity.
Barley Malt Syrup:
It gives the bagel its characteristic taste. I like to put Barley malt syrup into the dough, as well as the water bath the bagels are getting boiled in before baking. Unfortunately, it is not something you typically find in a regular grocery store, but Amazon has it, and I usually order this one.
Moister:
Contrary to what you would expect, the higher the water content in your dough, the crispier your bagel. So, use more water in your dough if you like a crispy bagel over a chewy one. I know it is all a matter of preference, so don’t be afraid to adjust it to your liking.
Make the bagels
1. Weigh the dough pieces:
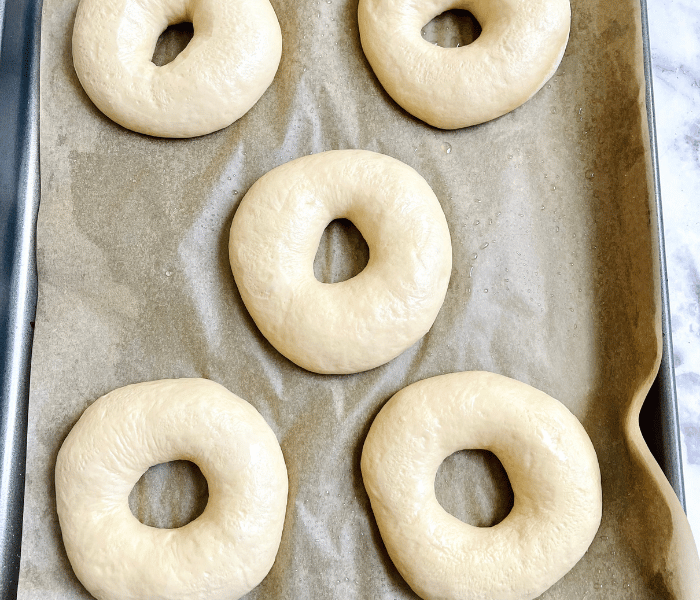
After your dough has doubled in size (this takes anywhere from 1-2h), turn your dough onto a clean work surface, take your kitchen scale, and cut/measure 8x100g pieces (3.5oz). Roll each dough piece against the counter into a tight ball with a smooth surface. Do not use any flour, or the dough will not stick, and the seam on the bottom will open up, resulting in uneven, split bagels.
2. Shape them
Then shape the bagels one at a time. Stick your index finger or a wooden spoon through the center of a dough ball. Roll the bagel in a circle around your index finger or wooden spoon, stretching out the hole until it is 1 1/2 to 2 inches wide. Remember that the dough will shrink a little as the gluten pulls back; if the dough isn’t stretched into a fairly wide ring, you might end up with bagel balls (meaning the hole is pretty much gone).
Transfer the bagel to a baking sheet lined with parchment paper and repeat with the remaining dough balls. Cover with plastic wrap.
Refrigerate the dough bagels
Place the baking sheet in the refrigerator overnight (or for up to two days). The second long proof allows the bagels to ferment slowly, gives the dough time to release flavors, and gives it a better structure.
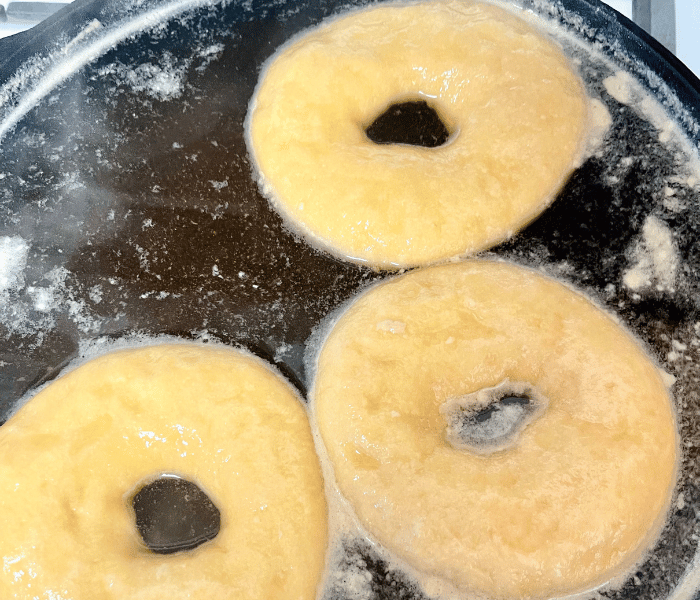
Why the water bath before baking?
It’s the step that makes a bagel a bagel and not just a round bread with a hole. Dunking the bagels in a hot water bath will gelatinize the starches on the bagel’s outer surface. In plain English, the boiling makes for that nice, shiny, deep amber, chewy crust; it sets it and makes it thicker. Boiling also prevents the bagels from rising anymore in the oven, giving them their signature dense, chewy centers.
Tips:
➙ To avoid the bagels sticking to the parchment paper, rub the paper with some vegetable oil before placing the dough bagels onto it. This will make it easy to lift the bagels off and put them in the water bath without deflating them.
➙ Bagels are best eaten on the same day – or more like the first few hours fresh out of the oven. If you have leftovers, place them in an airtight container or ziplock bag and put them in the freezer as soon as possible.
Even if you plan to eat them the next day, I highly recommend putting them in the freezer overnight. Bagels stale by the hour – I feel like – so placing them in the freezer will keep them fresh, and you will be amazed by the difference it makes. Allow them to thaw for 30 minutes before toasting
➙ If you are craving bagels and don’t have any barley malt syrup on hand, you can substitute it with brown sugar in the dough and honey in the water bath.
E Guete, (Bon appétit)!! Don’t forget to share some pictures with me and tell me how you liked these Homemade Bagels. Also, it will make my day if you tag @mirjamskitchenyodel on Instagram, share on Facebook or pin on Pinterest.
If you loved this recipe, you might also enjoy the following:

Homemade Bagels


Ingredients
- 500 g Bread flour
- 320 g Water
- 20 g Barley malt syrup
- 14 g Salt
- 5 g Instant dry yeast
- 2 Liter Water
- 3 tbsp Barley malt syrup
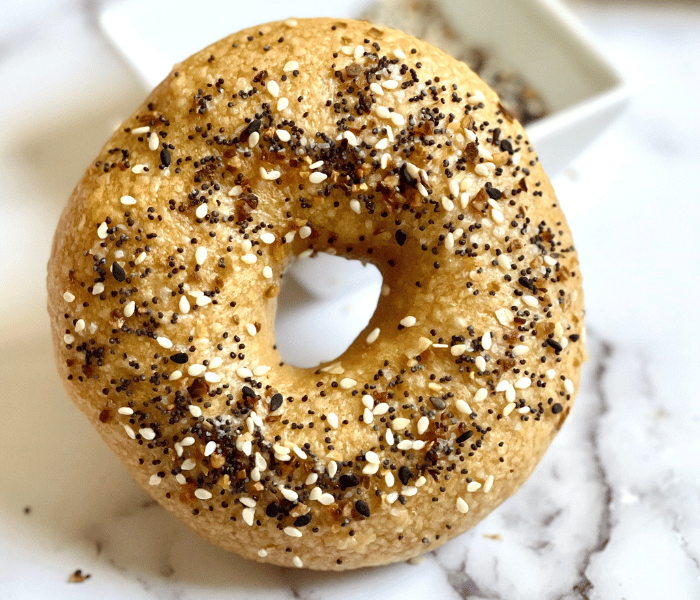
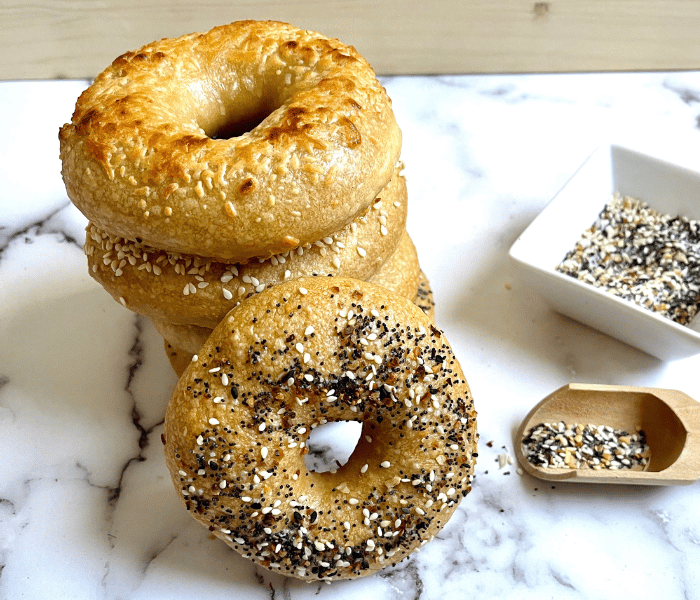
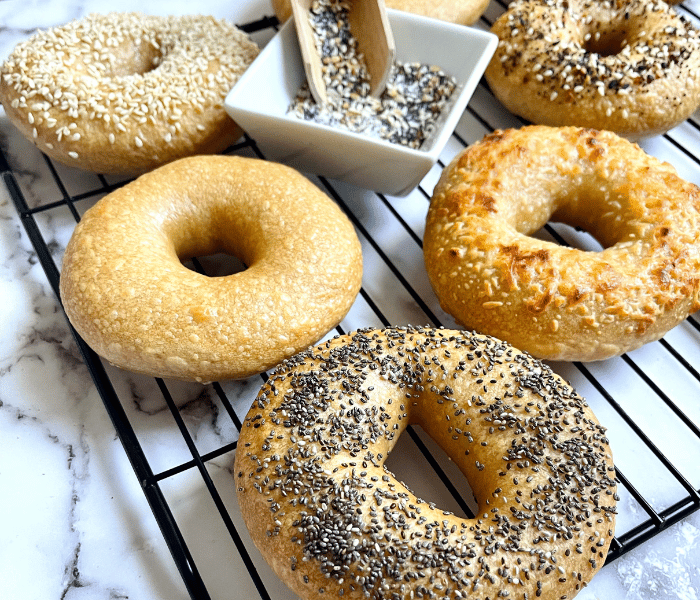
- Toppings of your liking
Instructions

Dough:
- Add the bread flour, salt, yeast, barley malt syrup, and water to the bowl of your stand mixer. Or if you don’t have a stand mixer use a big mixing bowl.
- Knead for 20-30 minutes until it has become a smooth, stretchy dough. (Since bread flour is a higher protein flour, it needs some more time and effort to develop the gluten, which means you need to knead it longer than if you’d use all-purpose flour.) The dough is ready if you can thinly stretch out a small piece on four corners without it tearing.
- Place the dough into a lightly floured or greased bowl, cover it with bowl covers, and let it rest for 1 to 1.5 hours or until noticeably puffy.
Shaping:
- Line a baking sheet with parchment paper and set aside.
- Turn your dough onto a clean work surface, then cut/measure 9x100g pieces (3.5oz) using a kitchen scale.
- Roll each dough piece against the counter into a tight ball with a smooth surface. Do not use any flour, or the dough will not stick, and the seam on the bottom will open up, resulting in uneven, split bagels.
- Then form the bagels, one at a time. Stick your index finger or a wooden spoon through the center of a dough ball. Roll the bagel in a circle around your index finger or wooden spoon, stretching out the whole until it is 1 1/2 to 2 inches wide. Remember that the dough will shrink a little as the gluten pulls back; if the dough isn’t stretched into a fairly wide ring, you might end up with bagel balls (meaning the hole will be pretty much gone).
- Transfer the bagel to the baking sheet and repeat with the remaining dough balls. Cover them with plastic wrap and place them in the refrigerator overnight (or for up to two days).

Water Bath:
- Preheat the oven to 425°F or 220°C.
- Pour two liters of water (2 quarts) into a large pot and add the barley malt syrup. Over high heat, bring to a very gentle boil. Once boiling, turn the temperature down to a simmer.
- Carefully lift one bagel at a time off of the baking sheet into the hot water, bottom side up. Handle them with care, so they don’t deflate. Depending on the size of your pot, you might add 3-4 bagels at a time; you want to ensure they don’t touch in the water bath.
- Boil each bagel for 2 minutes, flipping them halfway through.
- Remove the bagels with a slotted spoon, put them back on the baking sheet, and repeat with the remaining bagels.
- After about 30 seconds out of the water bath, add the desired toppings while still sticky.
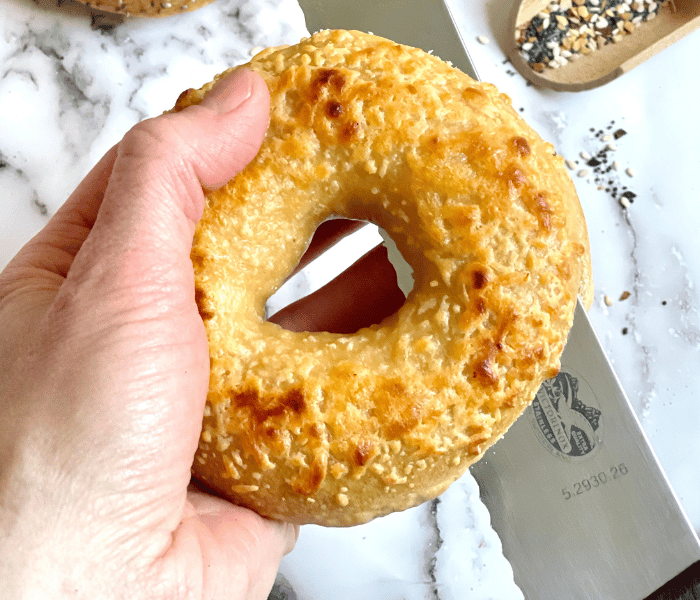
Bake:
- Bake on the middle rack until the bagels are golden brown and crisp, about 20-25 minutes. Rotating the pan halfway through if needed.
- Let cool for at least 15 minutes on a cooling rack.
- Serve slightly warm, and enjoy!

Notes
➙ To avoid the bagels sticking to the parchment paper, rub the paper with some vegetable oil before placing the dough bagels onto it. This will make it easy to lift the bagels off and put them in the water bath without deflating them. ➙ Bagels are best eaten on the same day – or more like the first few hours fresh out of the oven. If you have leftovers, place them in an airtight container or ziplock bag and put them in the freezer as soon as possible. Even if you plan to eat them the next day, I highly recommend putting them in the freezer overnight. Bagels stale by the hour, I feel like, so placing them in the freezer will keep them fresh, and you will be amazed by the difference it makes. Allow them to thaw for 30 minutes before toasting ➙ If you are craving bagels and don’t have any barley malt syrup on hand, you can substitute it with brown sugar in the dough and honey in the water bath.