
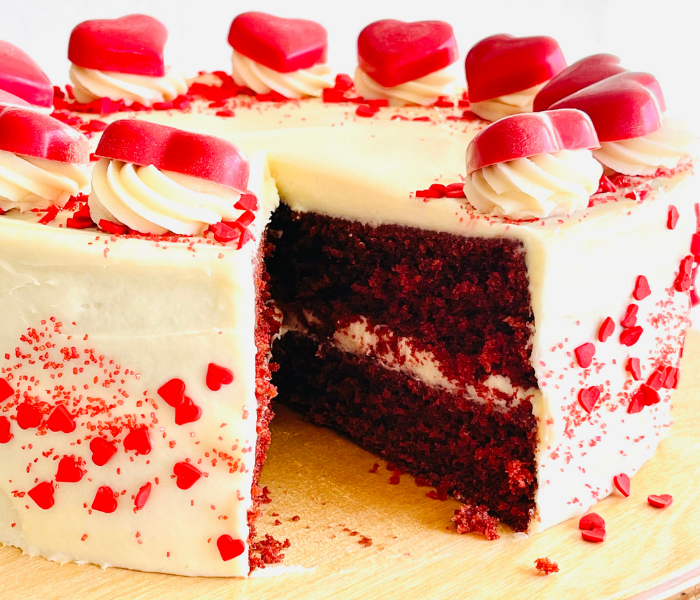
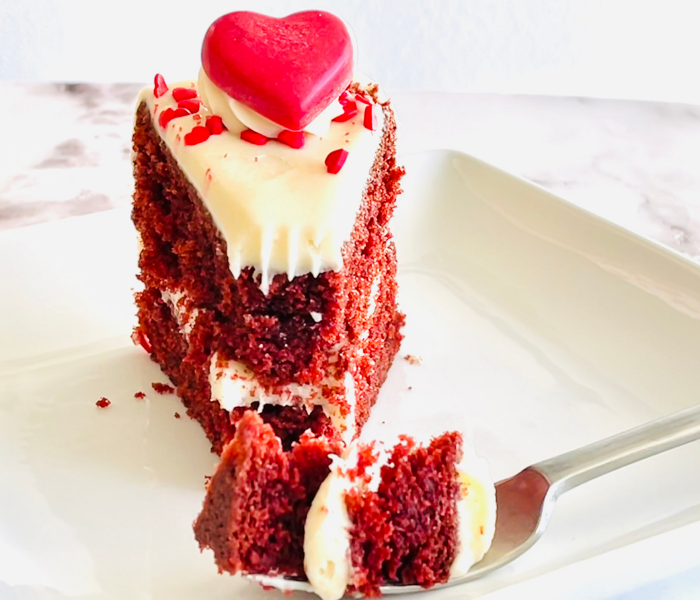
Red Velvet Cake
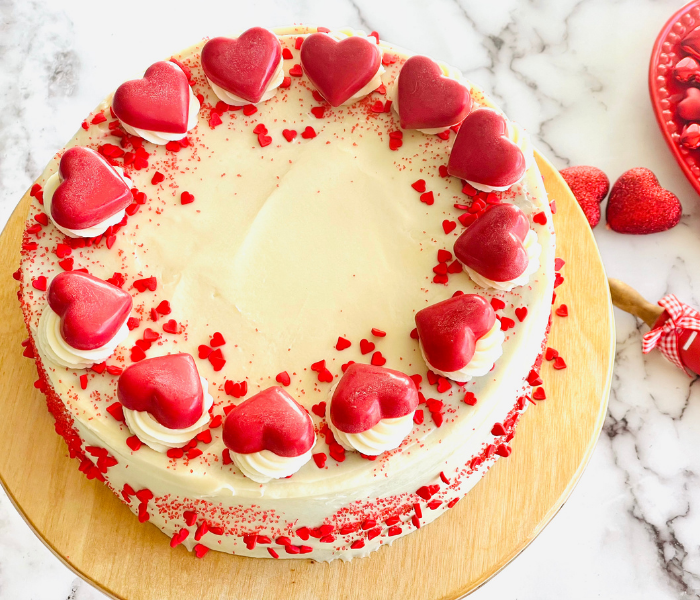

This Red Velvet Cake is moist, soft, and entirely made from scratch with an irresistible Cream Cheese Frosting. It looks so elegant but is surprisingly easy to make at home.
With its soft, velvety crumb and signature red or red-brown colored chocolate cake layers, this cake is great for special occasions like Valentine’s Day, Birthdays, and Christmas.
[Disclosure: This page contains affiliate links. If you take action (i.e., make a purchase) after clicking on one of the links, I’ll earn some tea money, which I promise to drink while creating new content for you 🥰. You do not pay a higher price!]
What gives it the red color?
It’s mainly through a natural reaction of three key ingredients: vinegar, cocoa, and buttermilk. You also want to add some red food coloring to achieve a very vibrant, bright red.
Cocoa Powder naturally turns a dark red when it reacts with buttermilk, and the vinegar adds extra acid to help maintain the red color during baking.
What food coloring works best?
I don’t like to use food coloring, but in this recipe, I recommend it! It gives the cake such a particular color. I prefer gel food coloring over liquid one. First, it is more concentrated, meaning you need less of it. I only used 1/2 teaspoon of red food coloring in this cake batter. Secondly, the gel is thicker and, therefore, less likely to change the consistency of your batter or frosting.
I have this 12-color starter kit, and it’s been working very well for me. It is great for any baking project!
Can I make this cake ahead of time?
Yes, you sure can. There are a few different options:
- Refrigerate: You can fully assemble and finish the cake and refrigerate it for 1-2 days before you serve it. I recommend covering it up with plastic foil once the cream cheese frosting has hardened.
- Freeze: You can freeze an assembled cake in a cake box for up to two months. Additionally, cover the box with foil to prevent freezer burn.
- Freezing the cake layers: You can freeze the cake biscuits and the cream cheese separately. Once the cakes are fully cooled, wrap them (each individually) in plastic wrap and place them in a pig zip lock bag or wrap them with aluminum foil. Place the cream cheese frosting into a freezer-safe container.
- Thaw the cake: Take the fully assembled cake into the refrigerator overnight. The next day take it out of the fridge about 2 hours before serving to bring it to room temperature.
E Guete (Bon appétit! Don’t forget to share some pictures with me and tell me how you liked this Red Velvet Cake. It would make my day if you tag @mirjamskitchenyodel on Instagram, share on Facebook or pin on Pinterest.
If you enjoyed this recipe, you might also like the following:
Chocolate Cinnamon Winter Cake

Red Velvet Cake
Equipment


Ingredients
Cake batter
- 120 g Butter softened
- 300 g Sugar
- 2 Eggs room temperature
- 160 g Vegetable oil
- 2 tsp Vanilla extract
- 270 g Buttermilk
- 1 tsp Distilled white Vinegar
- 350 g All-purpose Flour plus more for dusting the cake pans
- 2 tbsp Cocoa powder
- 1 tsp Baking soda
- 1/2 tsp Salt
- 1/2 tsp Red food coloring
Cream cheese frosting
- 340 g Butter not too soft, still cold to the touch
- 230 g Cream cheese
- 1 tbsp Vanilla extract
- 460 g Powdered sugar
- 1/8 tsp Salt
Instructions
Cake batter
- Preheat the oven to 350°F or 180°C.
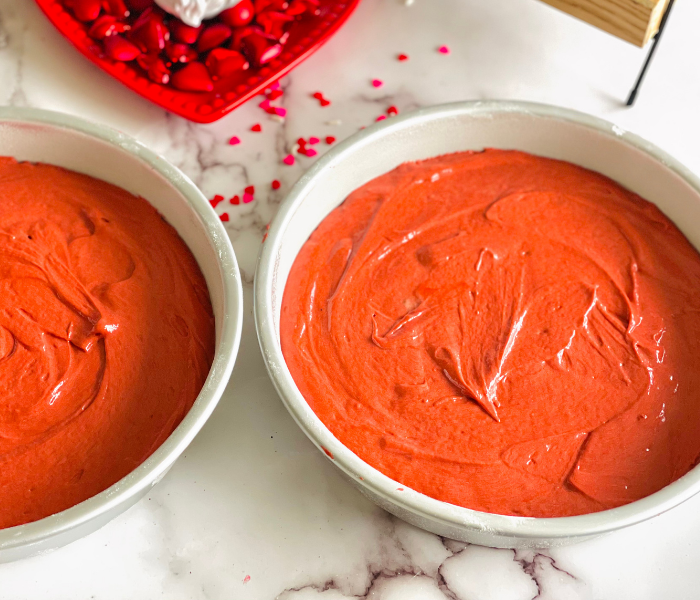
- Butter two 9-inch cake pans and then dust them with flour.
- In a medium-sized mixing bowl, combine all-purpose flour, cocoa powder, baking soda, and salt. Set aside.
- Add softened butter and sugar in a large mixing bowl, and mix with a hand or stand mixer until sugar is moist and well incorporated. Then add the vanilla extract and mix some more.
- Add one egg at a time and mix well before adding the next egg. Beat until there is no egg visible.
- Slowly add the vegetable oil; keep mixing while adding it to the batter.
- Combine the white distilled vinegar with the buttermilk and add it to the batter.
- With a sifter, sift the dry ingredients into the batter and mix it until no more flour mixture is visible.
- Add half a teaspoon of Red food coloring to the batter and mix until you have evenly red cake batter.
- Divide the batter into two cake pans. I use a kitchen scale and add about 650g of batter to each cake pan. If you use a scale, you will have two even cake layers.
- Put them in the oven and bake for 30-35 minutes.
- Take them out of the oven and let cool for about 20 minutes until you flip them over and take the cakes out of the pan and onto a cooling rack.
Cream Cheese Frosting
- Add the butter to a large mixing bowl, and with a hand or stand mixer, beat butter until it is creamy, smooth, and lighter in color.
- Mix the cream cheese in with the butter. Scrape down the sides to make sure you get it all mixed in.
- Beat in the vanilla extract and salt until incorporated.
- Add one cup of powdered sugar at a time and mix at low speed until incorporated. Once you have added all of the powdered sugar, increase the speed and beat for another 2-3 minutes until smooth and spreadable. Scrape down the sides from time to time to get everything well blended together.
- Place some cream cheese frosting in a pastry piping bag to pipe rosettes on the cake.
Assemble and Decorate the Cake
- Once the cakes are cooled, you can assemble them. Put one cake round on a cake stand and add about a third of the cream cheese frosting. Spread it evenly with an offset spatula.
- Then add the second cake on top of the cream cheese filling and add more of the filling on top & the sides of the cake. Make sure you cover it well and then smoothen out the sides and the top.
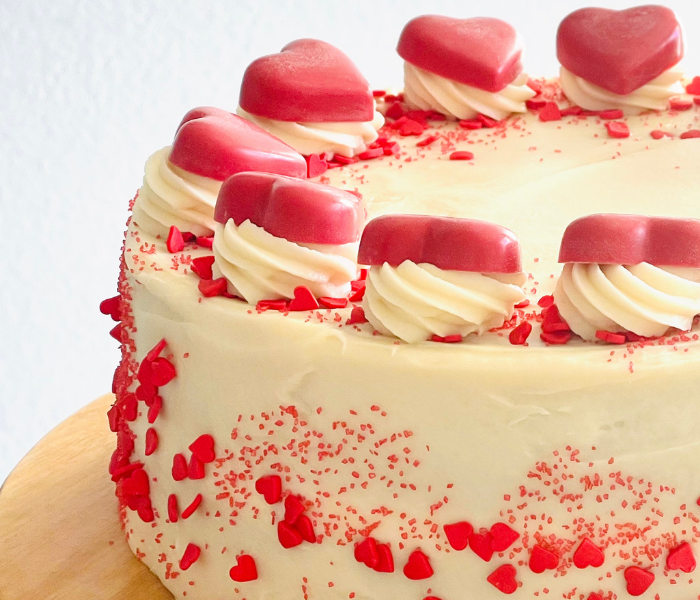
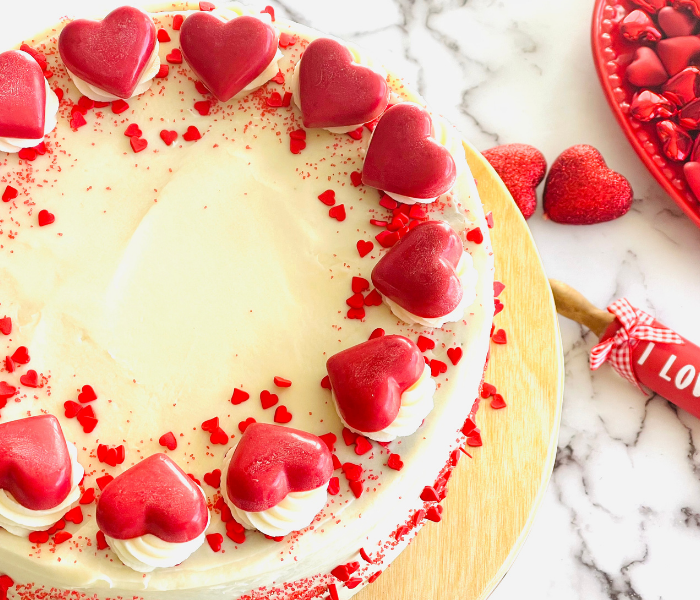
- Sprinkle the red sprinkles around the outer part on top of the cake and sprinkle some onto the sides.
- Pipe 12 rosettes on the cake.
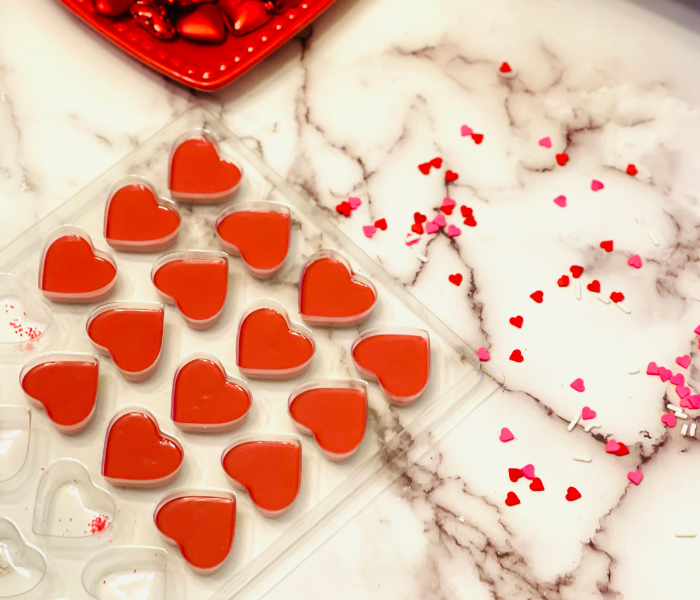
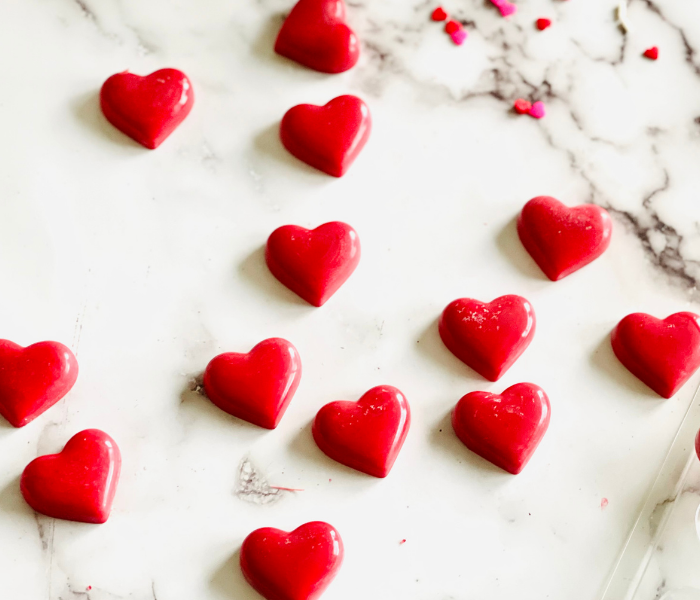
Red Chocolate Hearts
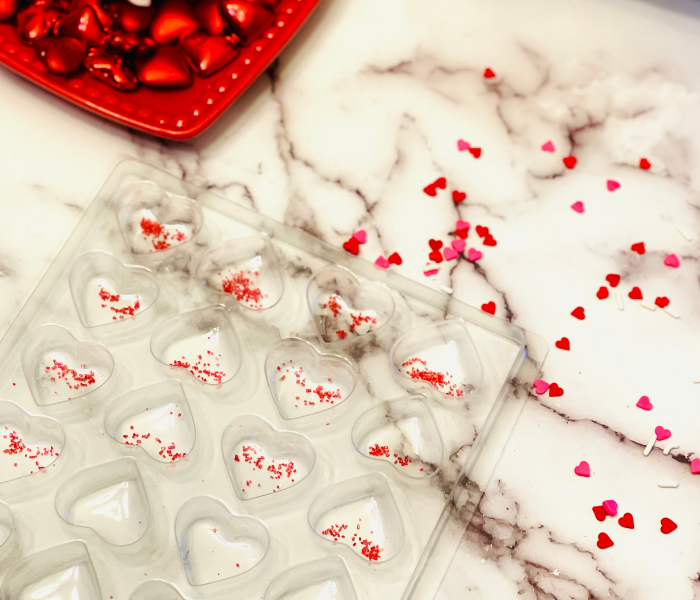
- Optionally, add a chocolate heart to each rosette. I made my own chocolate hearts by melting some red vanilla chocolate wafers and piping them in the heart molds. Let them cool to harden; once harden, take them out of the molds and place one heart on each rosette.
- Set the cake in the refrigerator for about half-hour before you cut into it. It will harden the Cream cheese frosting slightly and makes the cutting easier. Enjoy!